







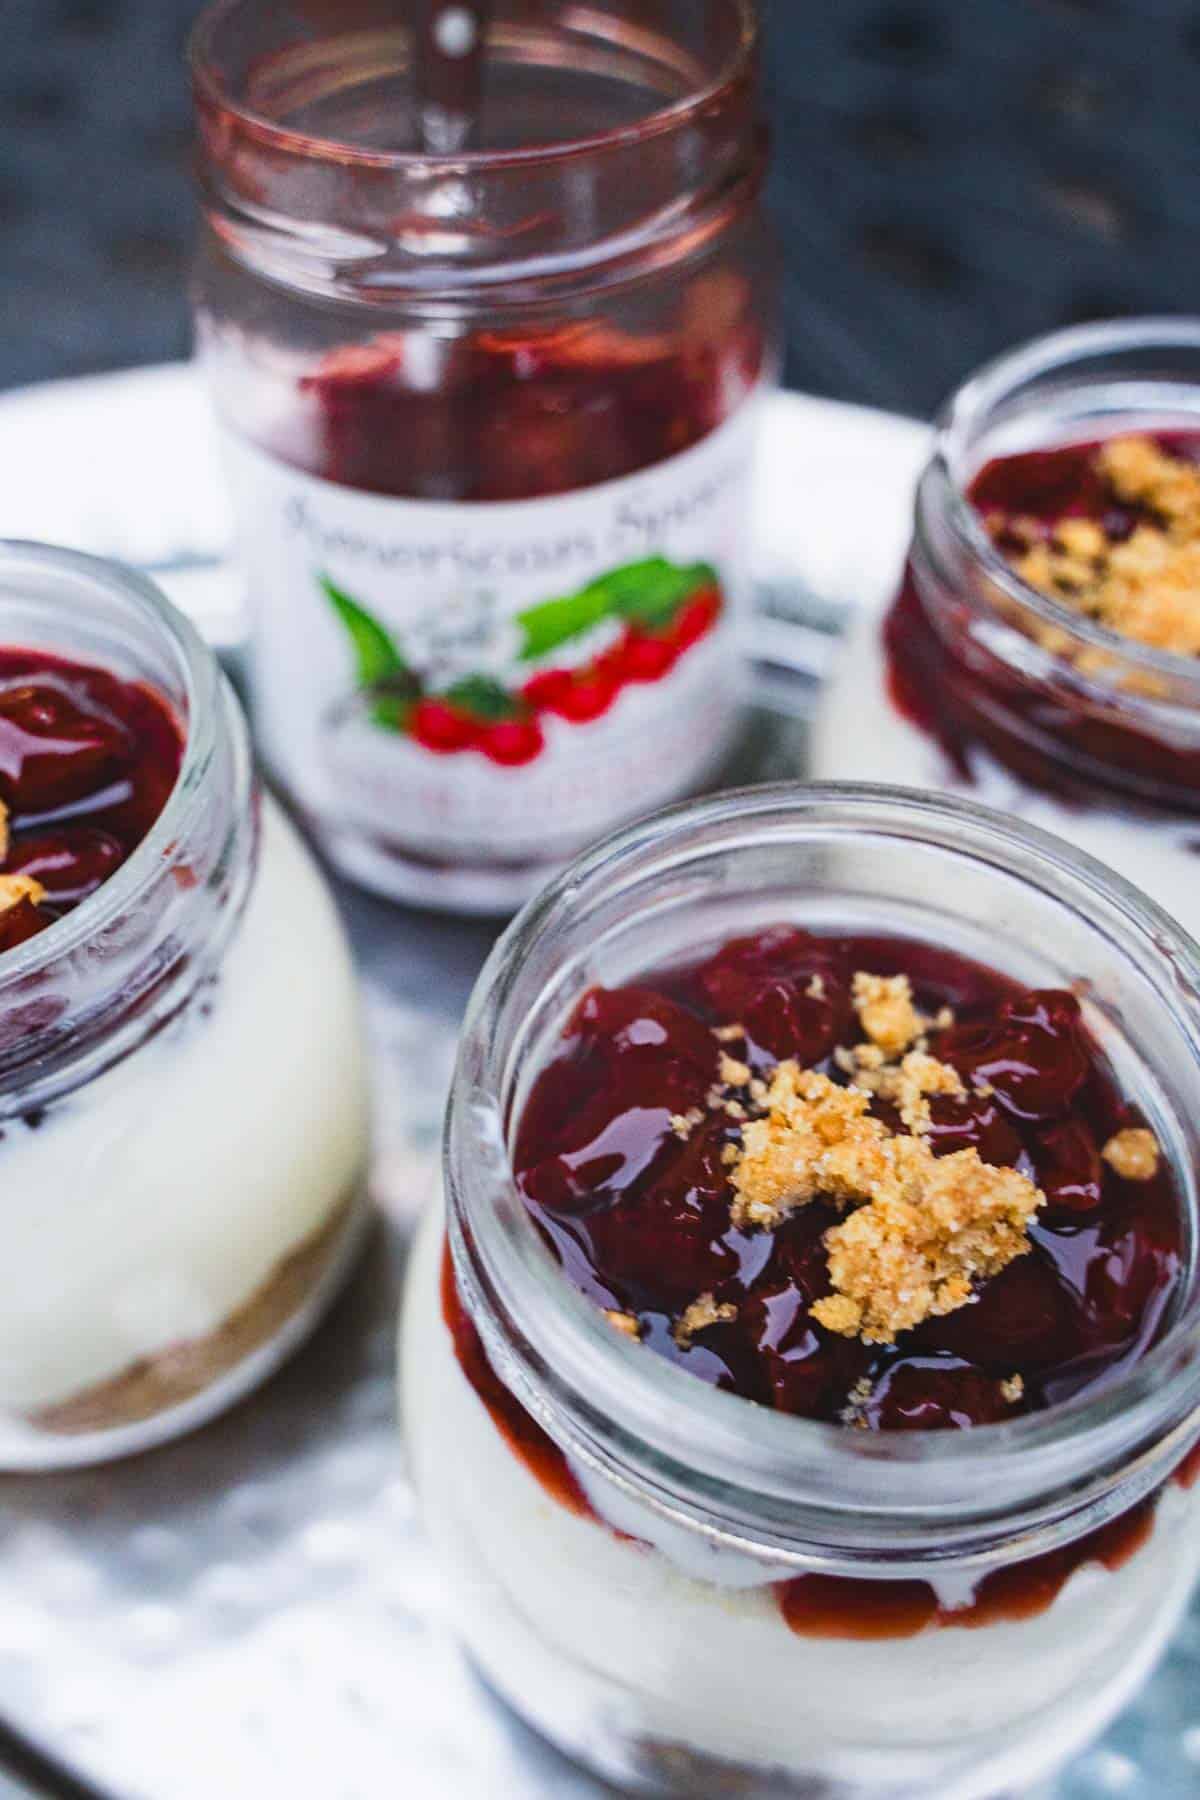
There's something about layers of buttery graham crackers, creamy cheesecake filling, and sweet and sour cherry topping that feels like summer in every spoonful. This No Bake Cherry Cheesecake Recipe in Mason Jars is rich, creamy, and incredibly easy to make-no oven, no water bath, and no worrying about cracks in the filling. Just mix, layer, chill, and enjoy an old-fashioned cherry cheesecake made perfectly for two.
The Story Behind This Recipe
Every summer my family packed up in Wisconsin and drove south-west to visit my grandparents in Diller, Nebraska-a tiny farming town of barely 300 people. While everyone looked forward to fireworks and family cookouts, I secretly looked forward to one thing.
Grandma Maxine's no bake cherry cheesecake.
She made it just for me every Fourth of July because she knew it was my favorite dessert. I can still remember opening the refrigerator and spotting that bright red cherry topping waiting behind the potato salad and iced tea.
Her recipe couldn't have been easier. Cream cheese, sweetened condensed milk, a splash of vanilla, fresh lemon juice, and a graham cracker crust. It was one of those recipes that didn't require measuring cups lined up across the counter or fancy techniques. You simply mixed everything together, poured it into the crust, and waited for the refrigerator to do the hard work.
When I wanted to recreate Grandma Maxine's recipe for Our Table 4•2, I knew I wanted something that felt a little more modern and worked better when cooking for two. Instead of making an entire cheesecake, I layered everything into little mason jars so every spoonful has buttery graham cracker crumbs, creamy cheesecake filling, and sweet cherry topping. They're nostalgic, portable, and just the right size for sharing around a table for two.
Jump to:
- The Story Behind This Recipe
- Why You'll Love This No Bake Cheesecake Recipe
- Ingredients You'll Need
- How to Make No Bake Cherry Cheesecake Dessert Cups
- The Best Mason Jars for Cheesecake Dessert Cups
- How Long Does No Bake Cheesecake Need to Chill?
- Easy Cheesecake Topping Ideas
- Related
- No Bake Cherry Cheesecake Dessert Cups Recipe
- my new cookbook is here!
Why You'll Love This No Bake Cheesecake Recipe
- No oven required. Perfect for hot summer days when turning on the oven is the last thing you want to do.
- Made for a table of two. These individual mason jar dessert cups are just the right size to share without leftovers lingering in the refrigerator all week.
- The creamiest no bake cheesecake filling. Cream cheese and sweetened condensed milk create a rich, silky filling that tastes just like the one Grandma Maxine made.
- Perfect for making ahead. Prepare them the day before your cookout or dinner party and simply add the cherry topping before serving.
- Beautiful layers in every spoonful. The clear mason jars show off the buttery graham cracker crumbs, creamy cheesecake filling, and bright cherry topping.
- Easy to customize. Swap the cherry topping for fresh berries, lemon curd, or strawberry compote when the seasons change.

Ingredients You'll Need
Graham Crackers
Every great no bake cheesecake recipe starts with a buttery graham cracker crust. Since we're making dessert cups instead of a traditional cheesecake, the crumbs become little layers of crunch in every bite. Crush the graham crackers until they're nice and fine-you don't want big chunks interrupting that creamy cheesecake filling. A food processor makes quick work of it, but a rolling pin and a zip-top bag work just as well.
Unsalted Butter
Melted butter is the glue that holds the graham cracker crumbs together. Once chilled, it creates a buttery base that stays together when you dig in with your spoon while still being tender enough to scoop through.
Cream Cheese
This is the star of our creamy no bake cheesecake filling, so now isn't the time to reach for the whipped tub. I recommend full-fat block cream cheese, like Philadelphia, for the richest texture and best flavor. Be sure to let it come to room temperature before mixing-it makes all the difference for a silky smooth filling with no little lumps.
Sweetened Condensed Milk
This is Grandma Maxine's favorite ingredient in this no bake cheesecake recipe. It sweetens the cheesecake while creating that rich, velvety texture that makes every spoonful taste like classic cherry cheesecake. Since this recipe uses only half of a 14-ounce can, don't let the rest go to waste!
Store the leftover sweetened condensed milk in an airtight container in the refrigerator for up to a week, or freeze it in tablespoon portions for future recipes. I love stirring a spoonful into my morning coffee, drizzling it over fresh berries, mixing it into iced coffee, or using the rest to make a small batch of kulfi cardamon ice cream bars, key lime dessert cups, or another batch of these cheesecake dessert cups.
Fresh Lemon Juice
A little lemon juice may not seem like much, but it's what keeps the filling from tasting overly sweet. It brightens the flavor and balances the richness of the cream cheese and condensed milk. Fresh lemon juice is definitely worth squeezing here.
Vanilla Extract
Vanilla quietly ties everything together. It adds warmth and gives the cheesecake that familiar homemade flavor we all remember from family gatherings.
Cherry Pie Filling
When Grandma Maxine made her Fourth of July cherry cheesecake, she always reached for a can of cherry pie filling. And honestly, sometimes simple is exactly right. The glossy cherries are sweet, nostalgic, and instantly recognizable-the perfect finishing touch for these cherry cheesecake dessert cups. If cherries aren't your favorite, this recipe is just as delicious topped with fresh berries, strawberry compote, lemon curd, or roasted rhubarb.
Note: You will find the measurements and other helpful ingredient tips in the recipe card below.
How to Make No Bake Cherry Cheesecake Dessert Cups
This is one of those recipes that feels almost too easy to be this good. We'll start by making a buttery graham cracker base, whip together a silky cheesecake filling, then layer everything into mason jars before letting the refrigerator work its magic. If you've never made a no bake cheesecake recipe before, don't worry-I'll walk you through every step.
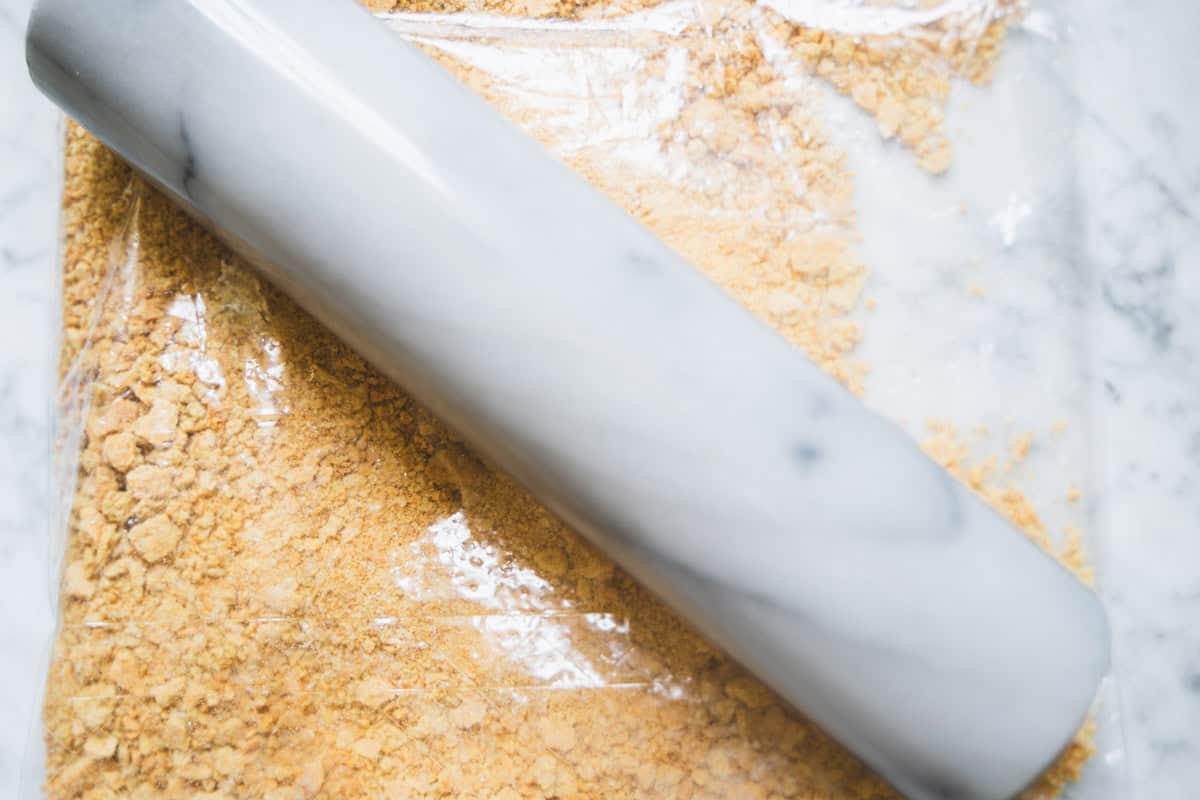
Step 1 | Crush the Graham Crackers
Let's start with the crunch! Place the graham crackers into a large zip-top bag and use a rolling pin to crush them into fine crumbs. It's surprisingly satisfying and a great way to work out any frustrations from the day.
If you have a food processor, that's even quicker. Just pulse until the crumbs resemble coarse sand.
Step 2 | Mix the Graham Cracker Crust
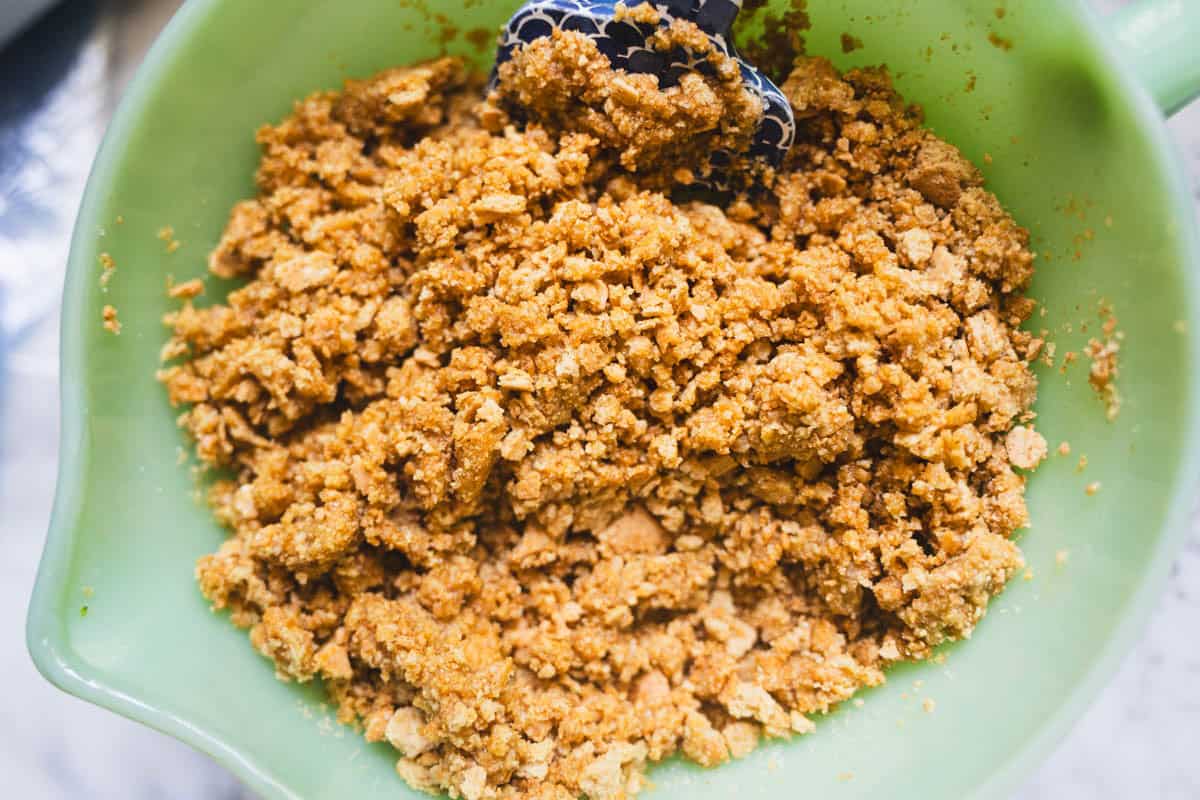
Pour the crumbs into a bowl and stir in the sugar. Drizzle in the melted butter and mix until every crumb is coated.
You're looking for the texture of damp beach sand. When you squeeze a handful together, it should hold its shape. If it does, you're ready for the next step.
Step 3 | Press the Crust into the Mason Jars
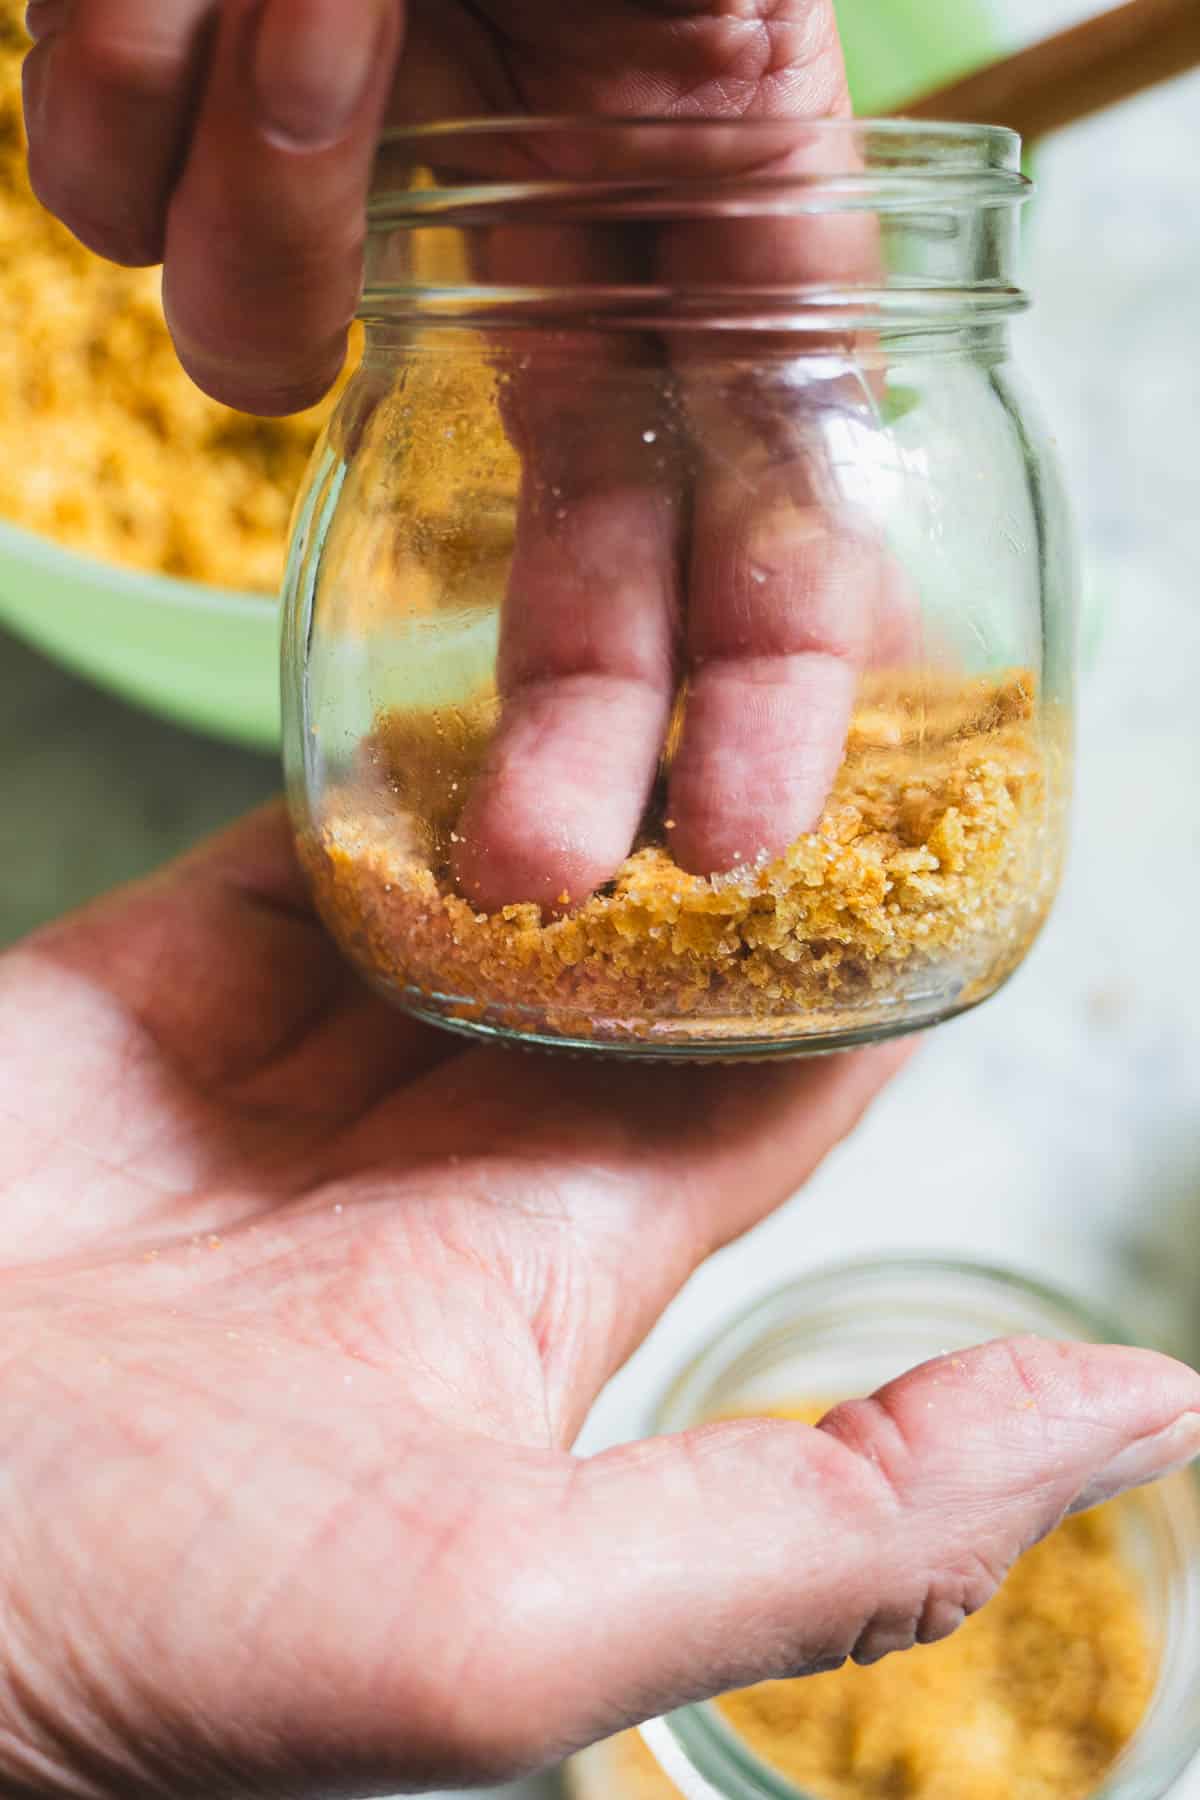
Divide the crumb mixture between your mason jars and gently press it into the bottom with the back of a spoon or your fingers. I like bringing the crumbs about an inch or so up the sides because those buttery layers peek through the glass and make these dessert cups look extra special.
Pop the jars into the freezer for about 10 minutes while you make the filling. That quick chill helps the crust firm up so it stays in place when you add the cheesecake.
Step 4 | Make the Creamy Cheesecake Filling
Now for the best part!
Make sure your cream cheese is at room temperature before you begin. Trust me on this one-it blends so much easier and gives you that silky smooth filling we're after.
Beat the cream cheese until completely smooth, then slowly add the sweetened condensed milk. Finish with the fresh lemon juice and vanilla extract, mixing until everything is creamy and luscious.
At this point, I always "taste test" with a spoon. It's a quality-control step... and I highly recommend it.
Step 5 | Fill the Mason Jars
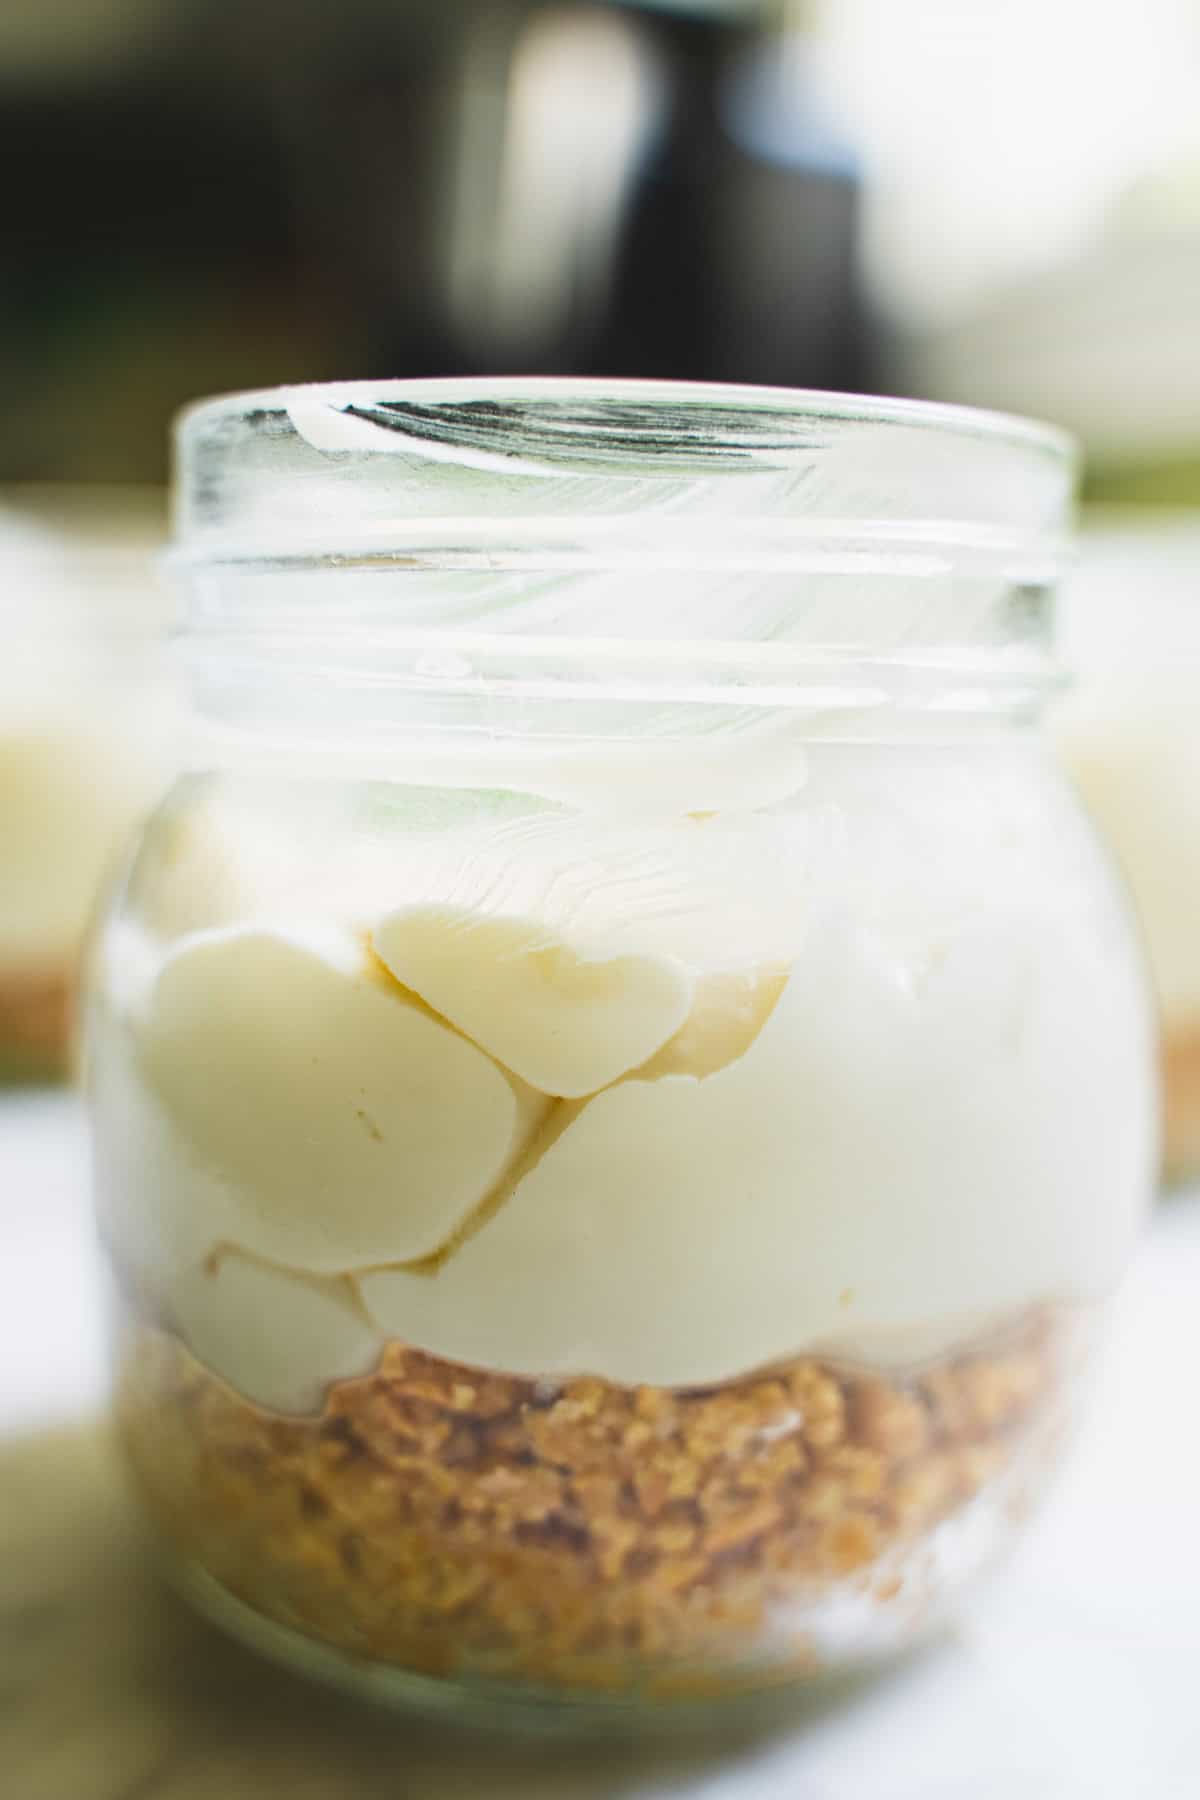
Spoon the cheesecake filling over the chilled graham cracker crust, smoothing the tops with a small spatula or the back of a spoon.
If you're serving these for guests, transfer the filling to a piping bag or a large zip-top bag with one corner snipped off. It makes filling the jars quick, neat, and gives those beautiful clean layers.
Step 6 | Chill Until Firm
This is the hardest part of the whole recipe because now...you wait.
Cover the jars and refrigerate them for at least 2½ to 3 hours. Overnight is even better if you have the time.
The filling needs those hours to firm up into that rich, creamy texture that makes no bake cherry cheesecake so irresistible.
Step 7 | Add the Cherry Topping and Serve
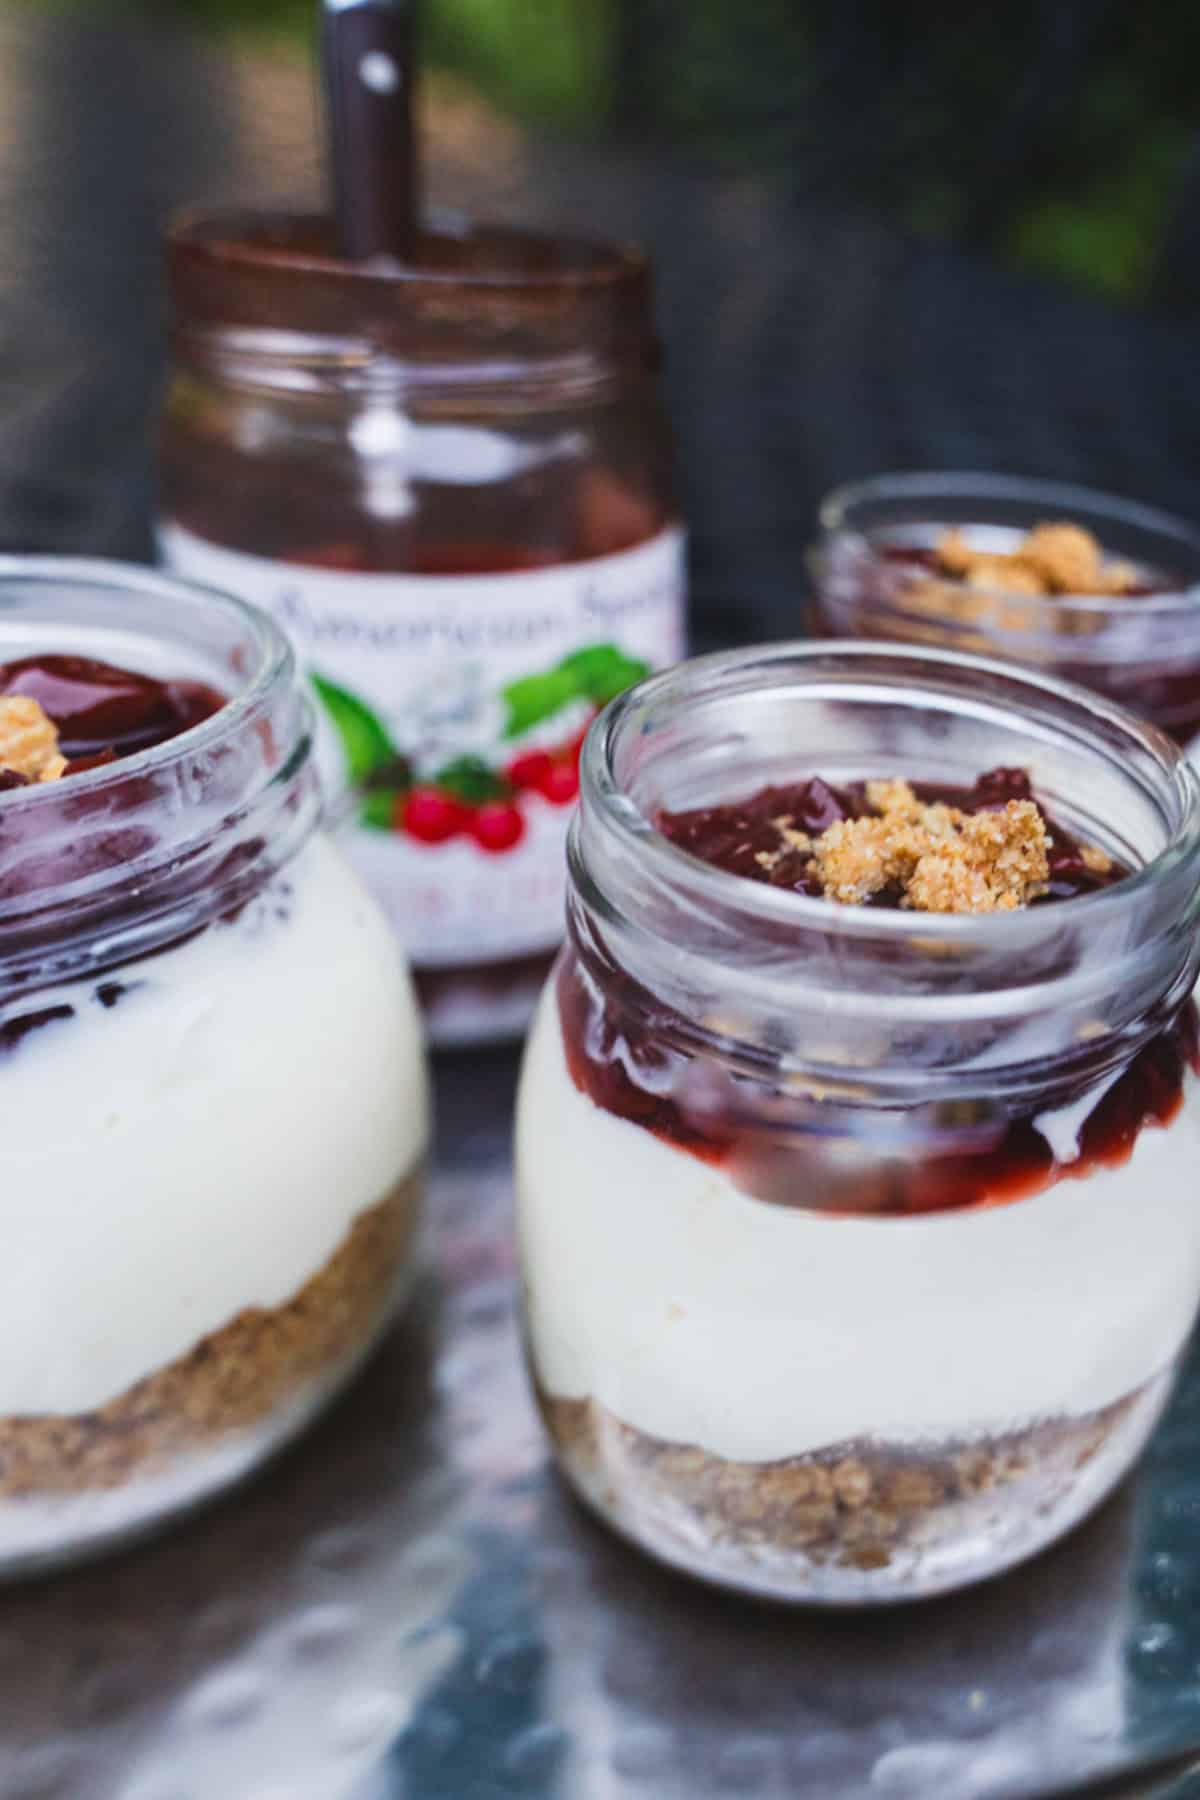
Just before serving, spoon the cherry topping over each cheesecake.
I love letting a little of that glossy cherry syrup run down the sides of the filling. It looks beautiful through the glass and lets everyone know exactly what's waiting inside.
Grab a spoon and dig all the way to the bottom so every bite has buttery graham cracker crumbs, creamy cheesecake filling, and sweet cherries. That's the perfect bite-and exactly how Grandma Maxine would have wanted it.
The Best Mason Jars for Cheesecake Dessert Cups
One of my favorite things about this no bake cherry cheesecake recipe is that you don't need a springform pan or fancy dessert dishes. Chances are, you already have something in your kitchen that will work beautifully.
The fun is showing off those gorgeous layers of buttery graham cracker crumbs, creamy cheesecake filling, and bright cherry topping. That's why I always reach for clear glass whenever I can.
- 10-Ounce Mason Jars - These are my first choice. They're just the right size for a generous dessert without feeling over-the-top, and the straight sides make it easy to build those pretty layers. Plus, if you're making these ahead, simply screw on the lids and pop them in the refrigerator until dessert time.
- Weck Jars - If you're serving guests or bringing dessert to a summer dinner party, Weck jars make these cheesecake cups feel a little extra special. Their wide opening also makes them easy to fill-and even easier to eat.
- Stemless Wine Glasses - Want to dress things up for date night or a holiday dinner? Layer the cheesecake into stemless wine glasses. The taller glass shows off every layer beautifully and makes this simple dessert feel restaurant-worthy with almost no extra effort.
How Long Does No Bake Cheesecake Need to Chill?
If I could give you just one piece of advice for making the best no bake cherry cheesecake, it would be this: don't rush the chill time.
I know it's tempting to grab a spoon the minute you've layered the cheesecake into the jars (believe me, I've been there!), but the refrigerator is doing some important work. As the cheesecake chills, the filling firms up into that rich, creamy texture that holds its shape while still melting in your mouth.
Here's what you can expect:
| Chill Time | What to Expect |
|---|---|
| 2½ hours | Soft, creamy, and just set enough to serve. |
| 4 hours | My favorite. The filling is firm, smooth, and easy to scoop. |
| Overnight | The best texture and flavor. The filling is perfectly set, making these ideal for making ahead. |
Why Does No Bake Cheesecake Need Time to Chill?
Unlike a traditional baked cheesecake, a no bake cheesecake filling doesn't rely on eggs or the oven to set. Instead, the cream cheese and sweetened condensed milk firm up as they chill in the refrigerator.
Think of it as the easiest part of the recipe-you've already done the mixing. Now the refrigerator takes over.
Easy Cheesecake Topping Ideas
One of the things I love most about this no bake cheesecake recipe is how easy it is to make it your own. While I'll always have a soft spot for Grandma Maxine's classic cherry cheesecake, this creamy no bake cheesecake filling is the perfect blank canvas for whatever fruit is in season-or whatever you're craving that day.
Here are a few of my favorite ways to change it up.
- Cherry Sauce Topping - This is the classic and my personal favorite. Sweet or Sour cherries and their glossy syrup are what I grew up with, and they'll always remind me of summer afternoons at my grandparents' farm in Diller, Nebraska. Canned cherry pie filling is delicious and wonderfully nostalgic.
- Fresh Strawberries - When strawberries are sweet and juicy, keep it simple. Slice them over the cheesecake or spoon over a quick strawberry compote
- Blueberries - Fresh blueberries alone or combined with cherry topping are beautiful on these little dessert cups, especially around the Fourth of July. You can also cook them down into a quick blueberry jammy sauce if you want something a little more decadent.
- Blackberry Sauce
- Lemon Curd
- Peach Compote
- Salted Caramel - Looking for something a little more indulgent? A drizzle of salted caramel adds buttery richness and turns these dessert cups into a cozy fall dessert.
Love this recipe? Please leave a star rating and review in the comments below! And don't forget to subscribe to Our Table 4 2 for even more cooking for two recipes and tips.
Related
Looking for other small batch dessert recipes like this? Try these:
No Bake Cherry Cheesecake Dessert Cups Recipe
Save This Recipe To Your Recipe Box
You can access your saved recipes on this device and generate a shopping list for recipes in your collections.
Equipment
- 3 mason jars 10 ounces
Ingredients
- 10 sheets graham crackers (about 1 package)
- 6 tablespoons unsalted butter melted
- 1 tablespoons sugar
- 1 8- ounce packages cream cheese room temperature
- ½ 14- ounce can about ¾ cup sweetened condensed milk
- 2 tablespoons fresh lemon juice
- ½ teaspoon vanilla extract
Instructions
- Crush graham crackers: Put graham crackers in a large resealable plastic bag, and crush them with a rolling pin until very fine crumbs form. Mix graham-cracker crumbs with sugar and butter. Pour crumbs into a medium bowl; stir in sugar. Add butter and stir until well combined.
- Press crumb mixture into mason jar: Divide the crumb mixture between your mason jars and gently press the crumb mixture into the bottom of each mason jar, spreading it 1 inch up the side; press flat with fingers or a spoon. Chill crust in freezer at least 10 minutes.
- Make the no bake cheesecake filling: Using an electric mixer set at medium-high speed, beat the cream cheese in a large bowl until smooth. Beat in the condensed milk a little at a time, scraping the sides of the bowl, as necessary. Beat in the lemon juice and vanilla.
- Add filling. Pour the filling into the crust; smooth the top with a rubber spatula. Cover with plastic wrap or jar lid, and refrigerate until firm, 2 ½ to 3 hours.
- Add the Cherry Topping: Just before serving, spoon the cherry topping or topping of choice over each cheesecake.
Your Notes, Tips and Tricks
Nutrition
Nutritional information is only an estimate. The accuracy of the nutritional information for any recipe on this site is not guaranteed.
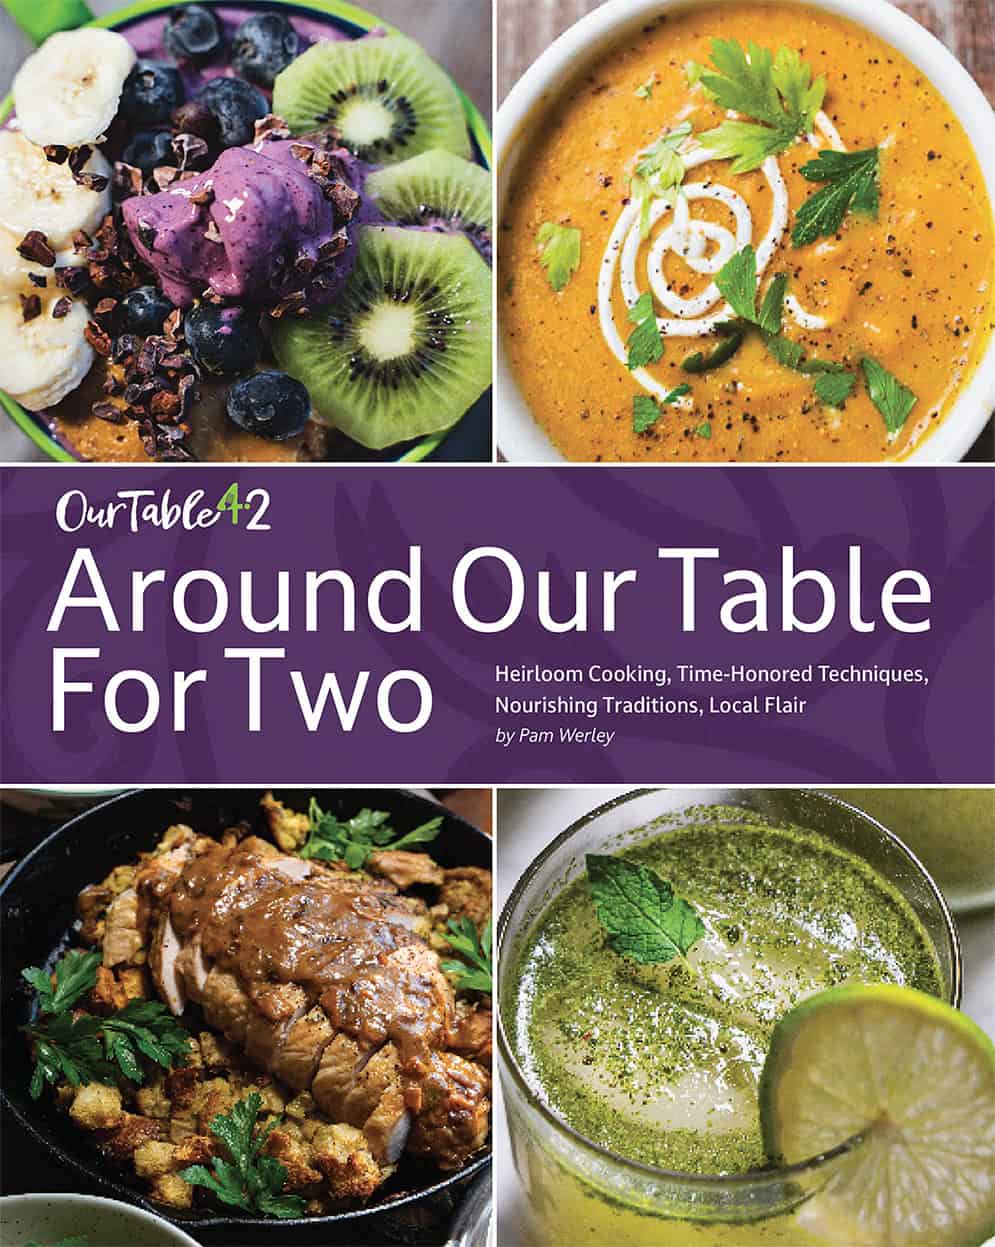
Now shipping!
my new cookbook is here!
Celebrate the joy of heirloom cooking with 130 recipes that reimagine family favorites for today's smaller table.

Leave a Reply