Frosting a 2-tier layer cake is easier than you think. Having the right tools and this how to frost a layered cake step-by-step guide with pictures - will have you frosting like a professional in no time.

Jump to:
Notes from Pam
Frosting a layer cake is intimidating! But after breaking down the steps I realized it was not as difficult as it seems. I’ll walk you through the steps for frosting a layer cake. With a few tools, patience, and practice, you will be decorating beautiful, layered cakes in no time.
Without further ado, let frosting 101 commence for a small 6-inch, 2-layer round cake!
Icing Equipment
First, you will need to gather your cake decorating tools. Here are the basics I find the most helpful when frosting a small 6-inch, 2-layer cake.
- A revolving cake decorating stand – this small investment is worth it, to avoid bending and twisting in awkward positions to create a smooth finish. You can also use a cake platter and we will line the edges of the cake platter with 4 strips of parchment paper to keep it clean.
- Angled spatula – this nifty tool helps spread the frosting and even helps to smooth the top and sides of the cake.
- Cake leveler –domed cake layers are difficult to stack and frost. To get even layers, we will use this to slice off domed tops.
- Cake transfer plate to easily transfer your cakes.
- Icing smoother.
Small 6-inch, 2-layer Cake Baking Equipment
A beautifully frosted layer cake is the perfect dessert for any occasion, but in a small household, most of it will go stale and dry out before it can be enjoyed. To make a petite layer cake suited for two, we will fill two 6-inch cake pans.
Step-by-Step Icing Guide
For this frosting demonstration I baked my small 6-inch, 2- layer carrot walnut cake with cream cheese frosting.
Let's get started with this step-by-step how to frost a layered cake guide:
Step 1 | Whip your frosting until it is stiff.
If your spatula will stand up in the frosting – you have a stiff frosting. This is necessary for a smooth finish. It also ensures your piping decorations will hold.

Step 2 | Slice off domed tops
Cake layers with a domed top are difficult to stack and frost. If your cakes dome, you can simply slice the domed section off using a serrated knife or a cake leveler tool. To make each layer level.

On the other hand, if your cakes caved, the good news is you don’t need to level the cake. Even better news is you can fill that cavity with frosting. Frosting lovers will love this!
Step 3 | Spread equal portions of frosting between layers.
First, let’s line the edges of your cake platter with 4 strips of parchment paper to keep platter clean. Place 1 cake layer on platter. Using an angled spatula, spread ½ cup frosting evenly over top, right to the edge of the cake. It’s okay if the frosting goes over the edges, we will smooth that out when we frost the sides.

- Place the second layer on top of the first cake. Repeat the process until your last cake layer, ensuring you use equal portions frosting like ½ cup for a 6-inch layered cake. If this is your last layer, place the last cake down with the flat bottom of the cake on top – love this trick for having a smooth top!

- Spread remaining ½ cup frosting evenly over top.

Tip: As we did before, evenly smooth the frosting on top of your cake. Again, pushing any extras to the side – we will get to smoothing the sides next.
Step 4 | Create a crumb coat
Using the angled spatula, cover the sides of the cake in a thin coat of frosting. This is called a crumb coat, it’s the “glue” to hold crumbs down for a crumb-free frosting finish. Plus, it seals in the cake's moisture!

Tip: Smooth the sides and top as much as possible.

Tip: Chill cake for at least 30 minutes to set the crumb coat.
Step 5 | Frost sides and top with a thick coat of frosting.
Spread about ½ cup frosting on top of the cake. Again, evenly spread the frosting over the top of the cake. Now, frost the sides of the cake with as much frosting as needed to cover up the cake.
Slowly spread the frosting around the cake until you have a smooth frosting.
With the cake on your cake turntable, use the cake knife to smooth the sides of the cake. Hold the cake knife straight against the side of the cake and rotate the cake gently. This takes a few practices to get smooth edges.
After smoothing the sides of your cake, use the same technique to smooth the top.

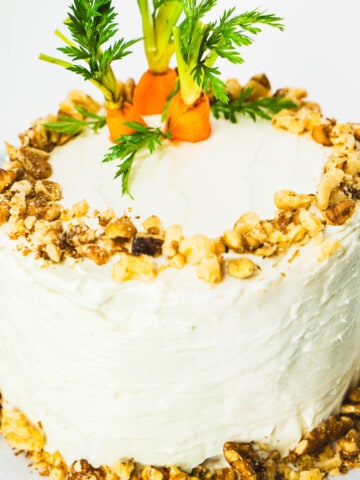
And that’s it! Now the fun begins with the decorations. For my carrot cake I used walnuts pressed into the frosting sides and on the edges on the top. Then, I peeled 2-inch of carrot tops with greens to use as decorations – it looks like the carrots are growing out of the cake!

I found this masterclass video on youtube that walks you through these steps as well, if you need additional steps.
Please let me know if you have any questions about this how to frost a layered cake guide in the comments below.
Related How To Articles
Looking for more recipes and tips on baking a small 6-inch 2-layered round cake? Check out these recipes and how-to tutorials:

Leave a Reply